Categories
Services & References
History of the Clip Strip® Video
What about cartons for loaded Clip Strips?
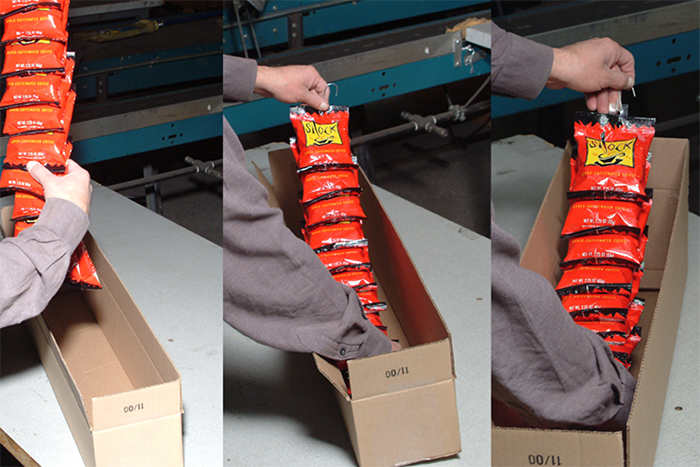
Today, many of our customers’ customers insist on receiving product pre-loaded on Clip Strips®. Larger retailers, especially, want to receive your goods pre-loaded and do nothing more than open up the carton, pull out the loaded strip by the S-hook and hang it. It becomes your responsibility to make sure that your product looks as good at the store as when it left your facility.
The challenge to the last preparatory step to a successful Clip Strip®program is making sure that your hard work in selecting the right strip, loading it and applying a branded label, won’t be undone by the shipping process. The key here is to have a carton that will fit your product and hold it tightly, with little or no movement once it is sealed.
You begin by fully loading a strip with your merchandise, stretching it out on a flat surface and measuring it’s length, width and height. If you are going to be shipping 2, 3, 4 or more strips to any one location be sure that you account for the additional height required. If one strip requires a 2” in height; two will require 4”; three will require 6” and so on…
LENGTH: When measuring the length of the strip, remember that the S-hook can be folded back onto the strip and shouldn’t be included in the overall measurement to determine the length of carton required.
WIDTH: Width is very important, and every effort should be made to find a carton width to match the width of your product with minimum excess space (1/4” or so).
HEIGHT: Height is frequently the dimension that ends up being compromised. Sometimes the number of strips to ship to stores may vary (based on the size of the store, for example or supplying more than one chain). Some stores may get 2; others, may get 4 strips. The carton is selected by the length and width and instead of carrying an inventory of various heights, you purchase the size that accommodates the greatest number of strips and use filler material to take up the space.

SHOPPING FOR A CARTON: A quick search on the internet will reveal a number of corrugated carton manufacturers. Use your dimensions to see which offered carton size comes closest to your needs. 200 lb. test cartons will be fine for most loaded strips. You may have to check a number of manufacturers to find your best option.
If nothing seems to suit your needs, contact a carton manufacturer directly and ask if they can produce a carton to your specifications. Custom cartons become affordable if the quantity of cartons needed is high enough. You may also get lucky, and find that tooling for a more suitable size has already been made (for another customer) and you can take advantage of the savings by not having to pay for the tool.


FILLER: If your carton quantity isn’t sufficient to justify the expense of a custom carton, buy the carton that comes closest in width and take up the extra space with filler material: bubble wrap, peanuts, cardboard, shredded paper; filled-air cushions, etc.
BAGGING: Another way to keep your strip looking good in transit is to insert it into a Poly-bag (above image shows bag in use). Some retailers will insist on a Poly-bag. Many carton suppliers also carry poly bags.
Again, the idea is to come up with the least expensive and consistent way to take up the empty space in the carton and secure your strip from movement.
THE FINAL TEST: To be sure that your “pack-out strategy” will work, we recommend taking a couple of cartons and sending them out via UPS or FedEx and see how they do. The best is to send it out to someone far from your location and ask them to refuse the package. That way, it travels twice. If after that exercise, your strip looks good – you know it will look great in the stores as well.


 Facebook
 LinkedIn
 YouTube